Creating a Work Order
<Accueil » Maintenance » Creating a Work Order
This topic describes the procedure for creating a work order.
Procedure
- Go to "Maintenance -> Aller sous "Entretien -> Work Order -> Work Order".
- Click the "New" button.
The "History" Tab
-
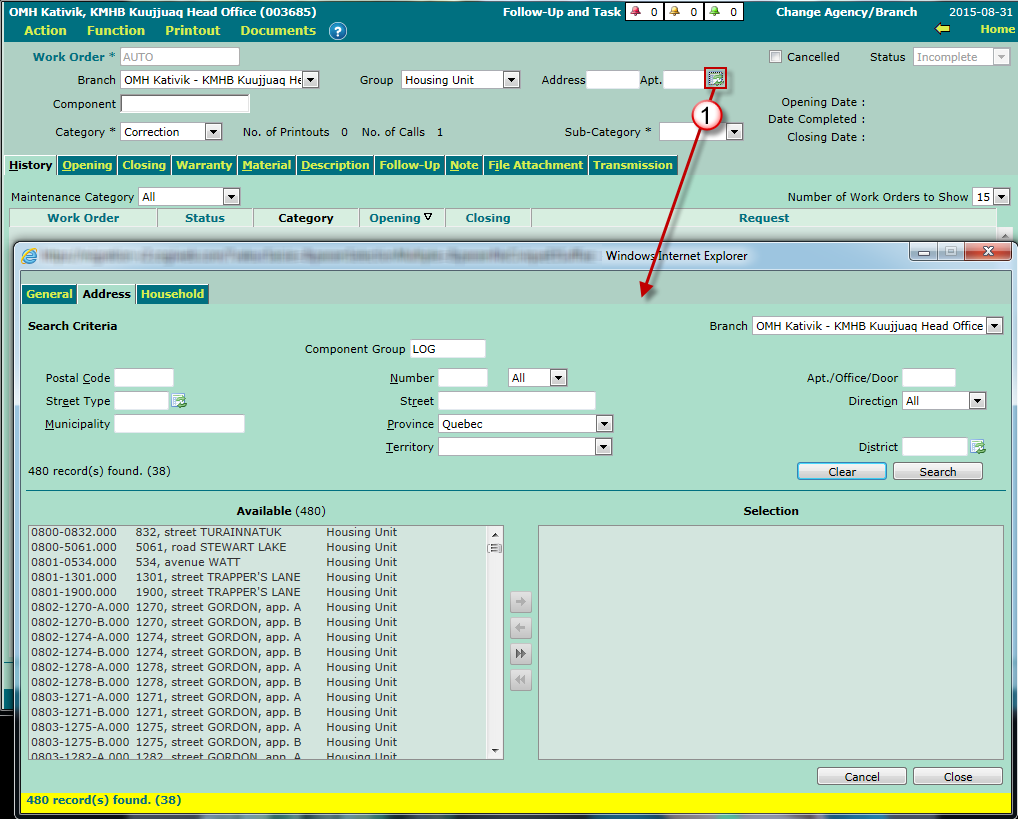
Select a component or multi-component under the "History" tab (mandatory).
- A multi-component must be selected from the corresponding drop-down list.
- If you do not know the component's or multi-component's code, you may retrieve it using the list of values. Please note that a work order may include several components.
- If you know the component's or "multi-component's code", you may enter it manually.
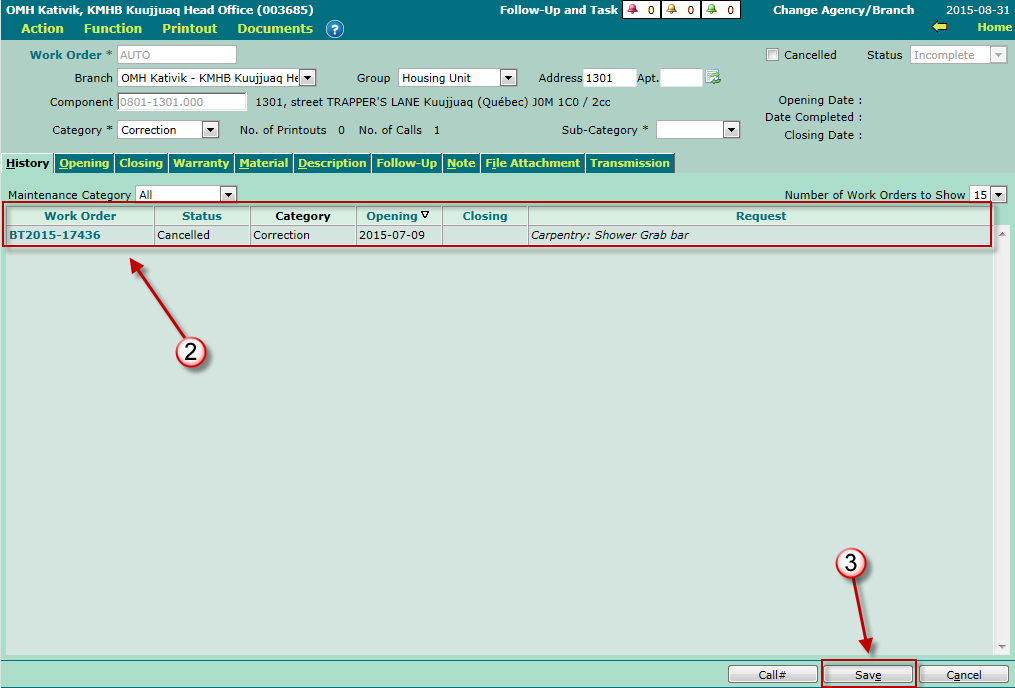
- The work order history on this component will show up under this tab. You will be able to verify whether a work order is already underway for the addressed issue.
- Click the "Save" button.
Please Note
A work order number will be auto-generated upon saving. The "History" tab lists all work orders related to the selected component, along with their status. This tab provides a quick overview of the jobs done on the component, and make sure that there are no work orders underway for the current issue.
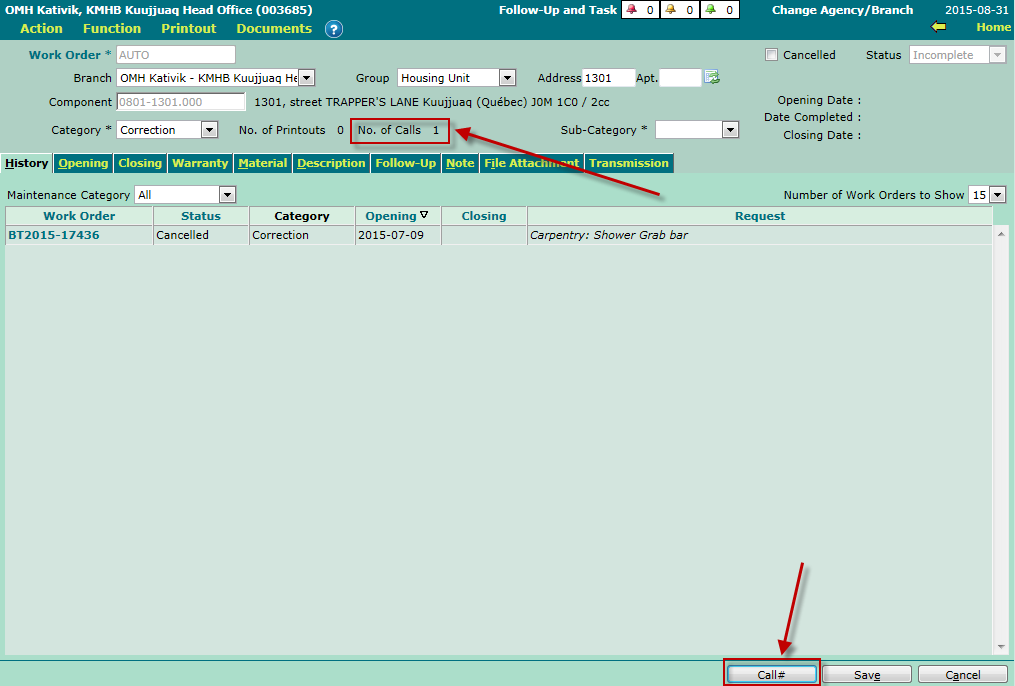
- The "Call #" button enables you to track the number of calls received with regards to the jobs to be performed on this work order.
- Every time a user clicks the "Call 1" button, the "No. of Calls" field at the upper end of the screen is incremented accordingly. This counter cannot be reset, and calls cannot be cancelled.
The "Opening" Tab
Please Note
- If the selected component is a dwelling, a section containing the household's information will appear. This section will not appear otherwise.
- The "Phone" bloc enables you to add or modify a phone number. All carried out modifications will be visible to the rental / selection personnel (as far as the Household module is concerned).
- A yellow "Note" tab means a note has already been added at the component or request level. If the several components are associated to the work order, the "Occupant" and "Phone" blocks will not show up. However, the maintenance-type note entered at the household level will show up.
-
Select an applicant or fill out the "Other" field (in the event that the applicant is not an occupant).
- If the component is a dwelling (as in the example below), the head of household's name will show up by default. Otherwise, fill out the "Other" field.
-
Select a "Person in Charge".
- The field will be auto-filled should a person in charge be already defined by default at the component level.
- The "Entered By" field is system-completed. The name of the work order creator will show up.
-
Select an agent in the "Assigned To" field.
- The field will be auto-filled should an agent be already defined by default at the component level.
- Select a "Service Contract" (should one be linked to the component). If several components are associated to the work order, all service contracts associated to these components will be available on this work order. All service contracts must be checked in order to have them appear on the the work order form.
-
The "Opening Date" field is system-generated.
- La date d’ouverture correspond toujours à la date du jour et elle est modifiable.
- The work order's intervention "Priority" will be indicated once the first request is created in the work order. However, you may select a different priority, if needed.
- Select a "Justification of Jobs" (if known, otherwise you will be able to specify this information when closing the work order).
-
Specify whether the personnel may enter the dwelling, using the "Authorization to Enter" drop-down list (mandatory).
- An option may already be specified. In this case, the option has been specified in the household's specifications.
- The drop-down list is available only if the component is a dwelling, and only one component is linked to the work order.
-
Check the "Call Before" box, if applicable.
- The checkbox is available only if the component is a dwelling, and only one component is linked to the work order.
-
Check the "Address for Visits" box if the address where the jobs to be done is different than the component's, and only one component is linked to the work order.
- The "Address" section will show up to help you to enter the new address.
-
Check the "To Invoice" box, if applicable.
- This checkbox is not liked to the Financial module whatsoever.
- This checkbox will also be available under the "Closing" tab.
-
Type in a "Comment" (optional).
- This comment will show up on the work order form..
-
Select a "Request" (mandatory).
- Click the "New" button to select additional requests.
- Pour savoir pourquoi certaines requêtes ne sont pas disponibles sur un bon de travail, référez-vous à la procédure du pilotage.
- The work order's default intervention "Priority" will be identical to that of the first request entered on the work order.
- Select the "Action" to be performed, if known.
- Type in a description in order to provide additional details, if needed.
- Click the "Save" button.
Envoi du bon de travail par courriel
Une fois créé, le bon de travail peut être transmis par courriel en cliquant sur le bouton "Courriel" dans la partie inférieure de l'écran "Bon de travail".
Please Note
- The work order's status will go from "New" to "Assigned". Furthermore, the "View" and "Print" buttons will appear at the bottom of the screen.
- The "View" button enables you to preview the work order prior to printing it, whereas the "Print" button sends the work order directly to the printer.
- After clicking the "View" or "Print" button, the work order's status will go from "Assigned" to "Underway".
The "Warranty" Tab (optional)
This tab enables you to view the component's elements covered by a warranty, as well as the warranty coverage period. Additional warranties can also be added under this tab.
Entering a New Warranty
- Enter the warranty coverage period ("From" and "To" dates).
- Specify the "Item Covered" (mandatory), as well as a "Reference", if needed.
- Select a "Supplier" and type in a "Comment", if needed.
- Click the "New" button to save the information.
Please Note
- A warranty applies to a component. Upon the creation of a work order, all warranties (effective, underway and future) linked to the component will show up under this tab.
- A warranty can be created at the component level.
- If several components are associated to the work order, each component's warranty will show up in the "Summary" section, where you will be able to select the warranties to be shown.
The "Description" Tab (optional)
This tab provides information related to the component. The tab's content varies, depending on the component type. For building-type components (building, sub-building and dwelling), should a modification be performed on this screen, that modification would be copied to the Building module.
The "Note" Tab (optional)
This tab enables you to view, if applicable, all notes associated to the component, request or work order. If there is a note at the component level, and this note is shared with maintenance, it will be possible to see it on the work order.
If there is a note at the request level, and this note is shared with maintenance, it will be possible to see it on the work order. Lastly, a note can be added to the work order, and this note will be visible on that work order only. The work order's note, or notes associated to the component or request, will appear on the work order when viewing or printing it, only if printing out the note has been authorized.
© COGIWEB, 2024