Creating a User Group
<Accueil » Administration » Creating a User Group
This topic aims at describing the procedure for creating a user group. Please note that user groups can only be created users who can access the Administration module.
Procedure
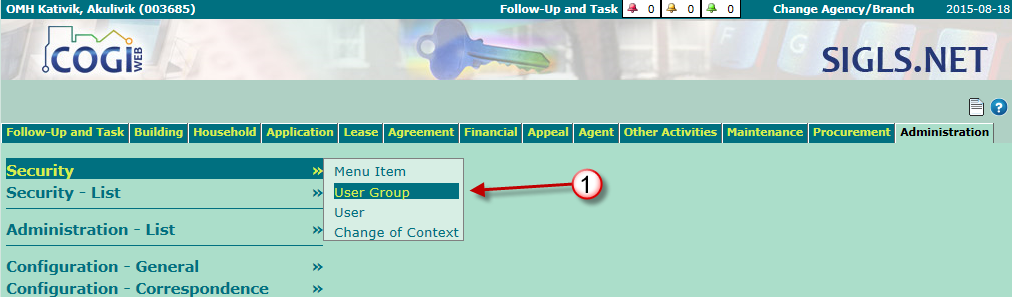
- Go to "Administration -> Security -> User Group".
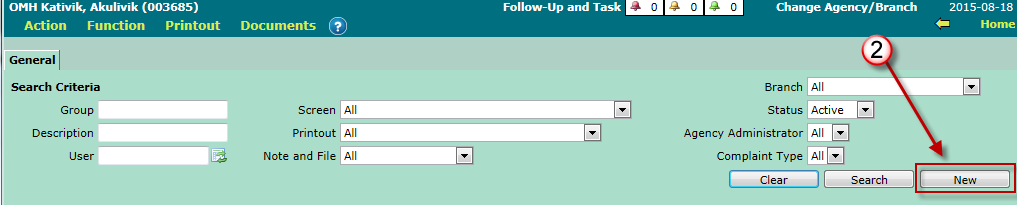
- Click the "New" button.
-
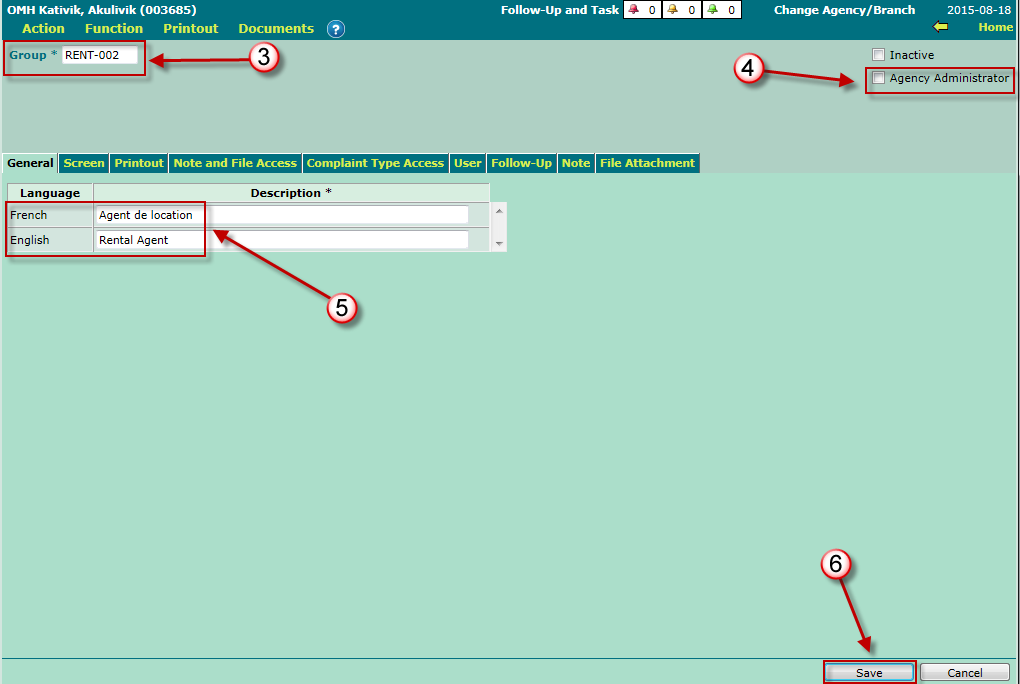
Enter the group name, under the "General" tab.
- Once saved, the group name cannot be modified.
-
If applicable, check the "Agency Administrator" box.
- This option enables you to show all menu items.
- Enter the group name in the "French" and "English" fields.
- Click the "Save" button to save the user group.
Access Rights Definition and Colors
The "Screen" and "Printout" tabs enable you to grant access rights to the user group. Here is the definition of every access right and color used.
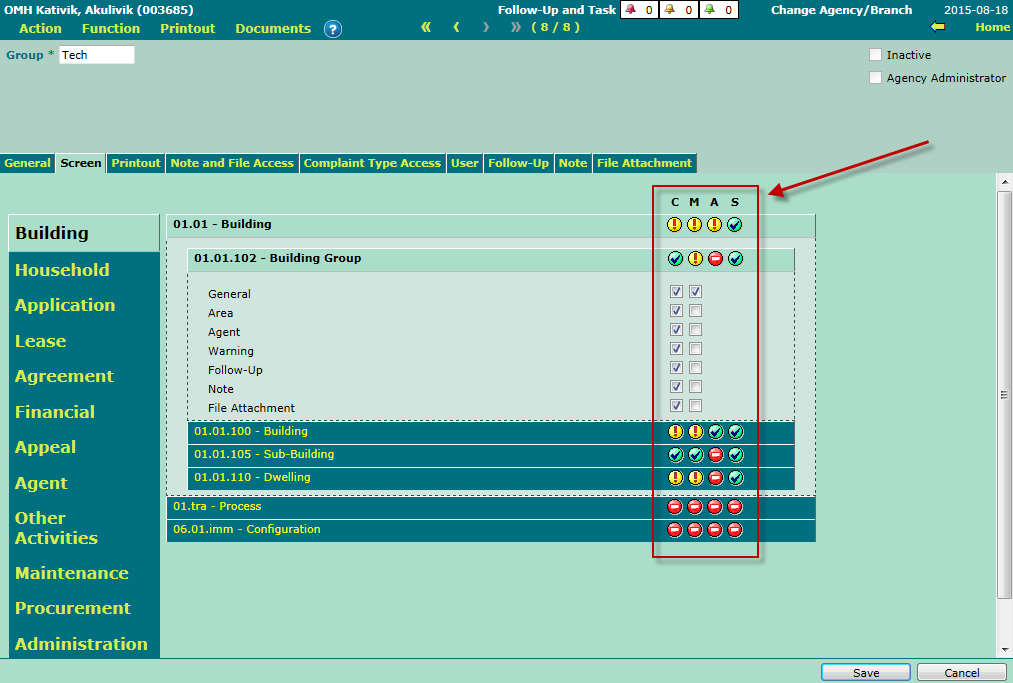
Access Rights
| Access Rights | Description |
| C | Consultation |
| M | Modification |
| A | Add |
| S | Deletion |
| I | |
| E | Export |
Colored Pictograms
| Pictogram | Description |

|
All items in the module or sub-module are selected. |

|
One or more items in the module are not selected. |

|
No item in the module or sub-module is selected. |
Granting Access Rights - "Screen" Tab
- Select a module.
- Select a sub-module.
- For every sub-module selected, check the access to be granted.
- Click the "Save" button.
Repeat this procedure for all modules and sub-modules the user group will be using.

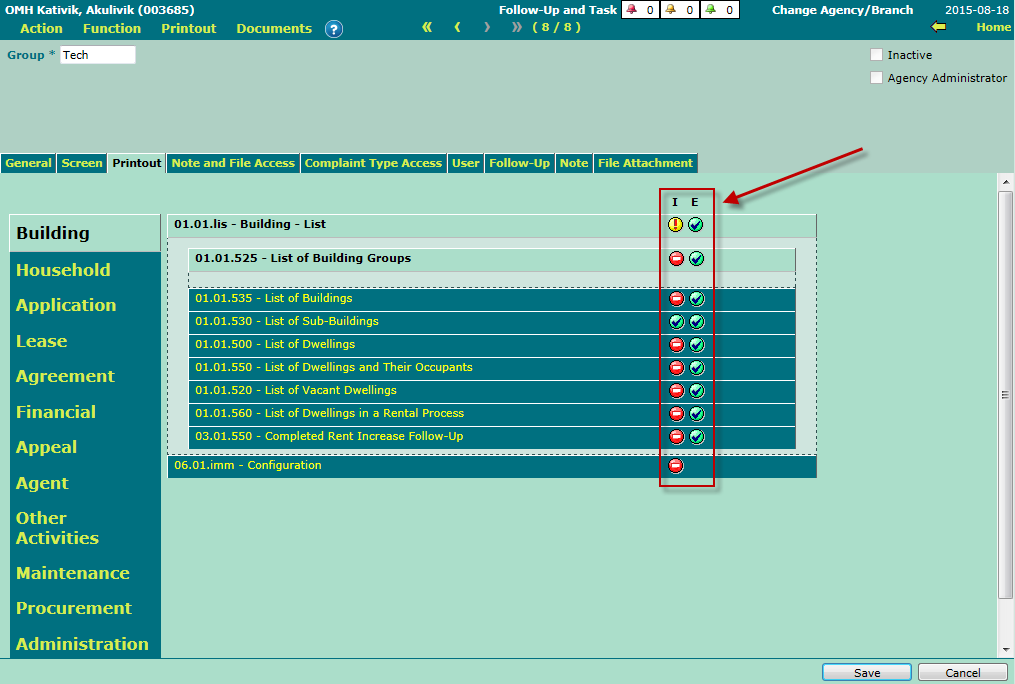
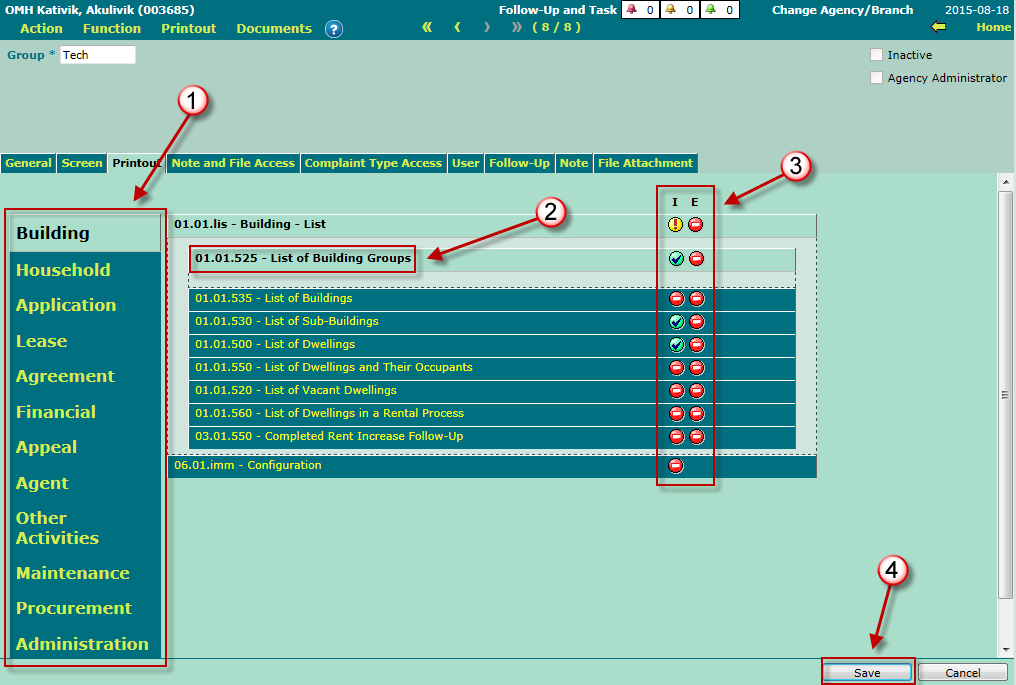
Granting Access Rights - "Printout" Tab
- Select a module.
- Select a sub-module.
- For every sub-module selected, check the access to be granted.
- Click the "Save" button.
Repeat this procedure for all modules and sub-modules the user group will be using.
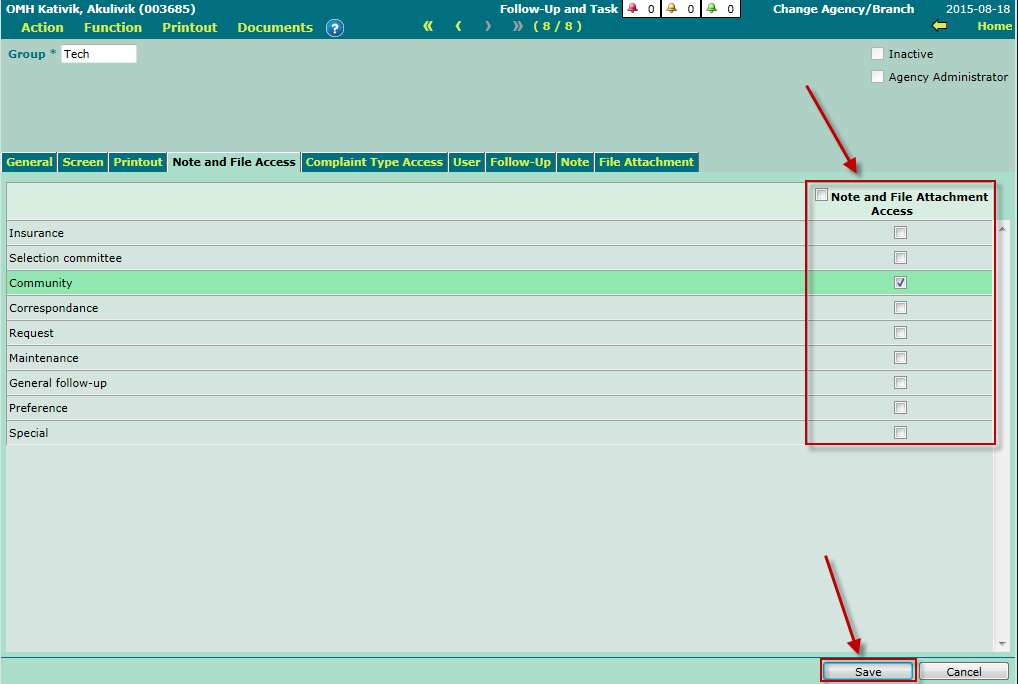
The "Note and File Access" Tab
This tab enables you to grant or deny access to notes and file attachments. Please note that all modules offer the possibility to create or view notes, as well as adding and viewing file attachments.
To grant access to notes and file attachments for a specific module, simply check the corresponding module, and click the "Save" button to save the changes.
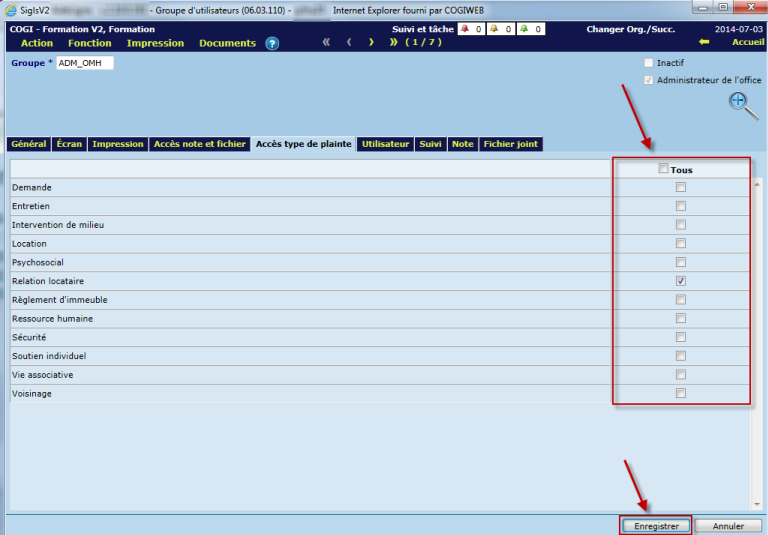
The "Complaint Type Access" Tab
This tab enables you to grant or deny access to specific complaint types. To do so, simply check the corresponding complaint type, and click the "Save" button to save the changes.
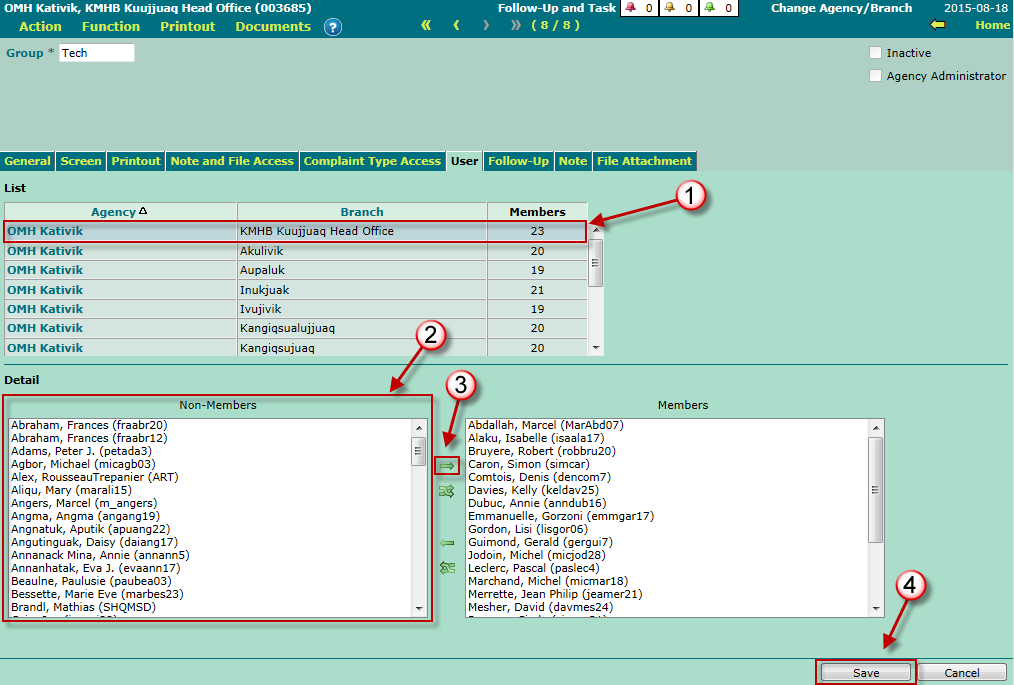
The "User" Tab
This tab enables you to associate users to the group. To do so:
- Select a branch in the "List" section.
- Select the users to associate to the group from the "Non-Members" list, in the "Detail" section.
-
Move the selected users to the "Members" list using the
 icon.
icon.-
To move all users from the "Non-Members" list in a single operation, use the
 instead.
-
To remove users from the group, select them from the "Members" table and use either the
 or
or  icons to move the users to the "Non-Members" list.
-
To move all users from the "Non-Members" list in a single operation, use the
- Click the "Save" button" to save the changes.
Repeat this procedure for other branches, if needed.
© COGIWEB, 2024